My Favorite DIY Coffee Table Plans That Made Guests Say ‘You Built That?’
Discover DIY coffee table plans that impress your guests with handcrafted charm. Easy-to-follow guides for stunning homemade furniture creations.
Have you ever felt bored with a store-bought coffee table? I did. But then, I got creative and started making my own. I used DIY coffee table plans and some simple tools. It was an exciting journey to make furniture that amazed my friends.
When friends saw my coffee table, they were amazed. They'd say, “You built that?” It felt amazing. Making furniture is more than just building something. It's about creating joy and making your home special.
Key Takeaways
- DIY coffee tables can transform your living space and serve as unique conversation starters.
- Embracing DIY coffee table plans fosters a sense of pride and personal accomplishment.
- Homemade furniture allows for customization to perfectly match your home’s decor.
- These projects can be completed with basic tools and some creativity.
- The journey of building your own coffee table is as rewarding as the finished product.
- DIY projects are a great way to express personal style and creativity.
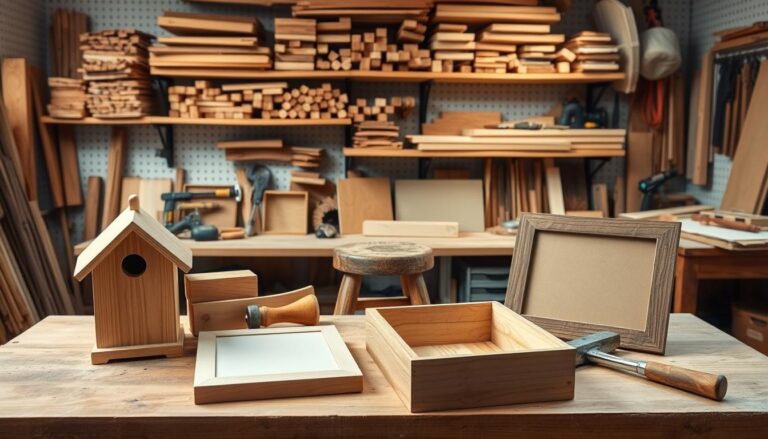
Introduction to DIY Coffee Tables
Exploring DIY coffee tables has changed my life. It's amazing to make your own furniture that saves money and shows your style. Making a coffee table is more than a project. It's a way to be creative and improve your woodworking skills.
Why Build Your Own Coffee Table?
Building your own coffee table is a great idea. There are so many woodworking projects to try. You can pick the materials, size, and design that fit your home perfectly.
Instead of looking for the perfect table, why not make it yourself? It's a fun challenge and a way to show off your skills.
- Customization: Tailor every detail to meet your specific needs.
- Cost-Effective: Save money compared to buying from a store.
- Pride of Creation: Enjoy the satisfaction of handcrafting your own furniture.
Benefits of DIY Projects
Starting DIY projects has many benefits. You get to turn raw materials into something beautiful. Plus, it's good for the planet because you're using old items and reducing waste.
Working on DIY projects can also be calming. It's a fun and rewarding hobby that helps you relax.
| Benefit | Description |
|---|---|
| Personalization | Customize designs to match your aesthetic and functional needs. |
| Cost Savings | Often cheaper than purchasing ready-made furniture. |
| Skill Development | Enhance your woodworking expertise and creativity. |
| Sustainability | Use recycled or reclaimed wood to minimize environmental impact. |
Are you ready to start making your own furniture? With a little effort and creativity, you can make a coffee table that's truly unique.
Reclaimed Wood Coffee Table
Looking for a unique coffee table? A reclaimed wood one is perfect. It's good for the planet and looks amazing. Plus, you'll get to say, “I made it!” Let's get started with the materials needed and step-by-step instructions to make your own!
Materials Needed
- Reclaimed hardwood flooring for the inside of the box
- 1 x 10s and 2 x 10s for the sides and ends of the box
- 4×4 posts for the legs, cut to about 16″ in length
- Scrap wood for trim and supports
- Recycled plaster lath for the border around the lower edge of the box
- Clear wax for finishing, applied in 2 coats and buffed with fine steel wool
Using reclaimed wood is good for the planet. It also adds history and charm to your table.
Step-by-Step Instructions
- First, cut your 4×4 posts for the legs. Each should be about 16″ long.
- Next, build the sides of the box. Use 1x10s and 2x10s, attaching them with nails or screws.
- For the top, cut pieces that fit with a 1″ overhang on both sides. A middle piece of scrap wood holds the top boards together.
- Add two scrap wood pieces, about 2″ x 29″, to secure the ends.
- Put reclaimed hardwood flooring inside the box for extra strength and look.
- Finish the edges with recycled plaster lath around the lower edge of the box.
- Apply two coats of clear wax for a shiny finish. Use fine steel wool to buff between coats.
Here's a quick summary of the project's main parts and materials:
| Component | Dimension | Material |
|---|---|---|
| Box width | 25″ | Reclaimed hardwood flooring |
| Side pieces | 10″ | 1 x 10s, 2 x 10s |
| Legs | 16″ | 4×4 posts |
| Top overhang | 1″ each side | Scrap wood |
| End supports | 2″ x 29″ | Scrap wood |
| Finish | – | Clear wax |
Want more DIY coffee table plans? Follow these steps and make a stylish, personal coffee table. Ready to start reclaiming wood and building?

Industrial Pipe and Fittings Coffee Table
Ever wondered how to make an industrial pipe coffee table that screams both style and durability? It's easier than you think! Let's dive into the essentials and give you the confidence to start on your own DIY assembly.
Choosing the Right Materials
Before you begin, it's important to gather the right materials. Here's what you'll need:
- Industrial Pipes: Opt for galvanized pipes. They're sturdy and come in various lengths and diameters.
- Fittings: Elbows, tees, and flanges are essential to connect the pipes together. Make sure all fittings match the diameter of your pipes.
- Tabletop: Choose a wooden slab that complements your room's aesthetic. It can be reclaimed wood or a new piece sanded smooth.

Assembly Instructions
Follow these step-by-step instructions to assemble your industrial pipe coffee table:
- Start with the base: Connect the pipes using elbows and tees to create a rectangular frame.
- Add vertical supports: Attach pipes vertically at each corner of the base.
- Secure the tabletop: Use flanges on the top ends of the vertical supports to attach the wooden slab. Ensure it's centered and bolt it down firmly.
- Final touch: Check all fittings to ensure they're tight and stable. You don't want any wobbly surprises!
There you have it! With the right materials and these clear instructions, your DIY assembly of an industrial pipe coffee table is a breeze. Ready to impress your guests?
Minimalist 2×4 Coffee Table
Ever thought of making a minimalist coffee table for your modern space? I made a stunning table with 2×4 wood pieces. It changed my living area and started conversations with guests. You can make one too, with simple woodworking, a minimalist design, and DIY home decor.
Design Inspiration
I wanted a coffee table that was more than just furniture. I aimed for something that stood out. Minimalism is about doing more with less. This table shows that perfectly, with its clean design and simple structure.
It's a great centerpiece for any living room. Imagine making something useful and beautiful. It's very rewarding.

Build Process
This DIY project is easy to do. You need basic tools and a few materials. Here's how to make it:
- Measure and Cut: Start with your 2×4 wood pieces. Measure and cut them to the right size for your coffee table.
- Assemble the Frame: Make a rectangular frame by joining the cut pieces. Make sure the joints are strong and stable.
- Attach the Top: Attach the tabletop to the frame with screws or nails. Sand any rough edges for a smooth finish.
- Finish: Choose a wood stain or paint you like. Seal it to protect against spills and scratches.
This project gave me a useful piece of furniture and added elegance to my home. It's amazing how simple materials can become stylish and practical. So, why wait? Start with those 2x4s and build your own minimalist coffee table!
DIY Coffee Table Plans from Kee Klamp
Exploring DIY coffee table designs with Kee Klamp fittings is fun. These fittings are great for making custom furniture easily. You don't need complicated tools or skills.
Types of Kee Klamp Fittings
Kee Klamp fittings come in many types. Each type is perfect for different coffee table designs:
- Standard Railing Flange fittings: These give strong support for the table base.
- Single Socket Tee fittings: Great for making right-angle connections.
- Rail Support fittings: Add extra strength to your table.
- Kee Lite fittings: These are lighter and look modern.
Popular Design Examples
I love making a coffee table with reclaimed wood and Kee Klamp fittings. It's a hit and starts great talks. Here are some cool designs to try:
| Design | Length | Depth | Height | Assembly Time | Tools Required |
|---|---|---|---|---|---|
| Reclaimed Wood Table | 3′ | 3′ | 19″ | 45 minutes | Allen Key |
| Sleek Modern Table | Configurable | Configurable | 2.5′ | 30 minutes | Allen Key |
| Square Glass-Top Table | 28″ | 28″ | 2′ | 30 minutes | Allen Key |
Adding casters makes your table moveable. You can also change its height. Use old bowling lanes or glass for a unique look.

Rustic Farmhouse Coffee Table
Do you want to add a cozy rustic farmhouse decor to your home? A handmade coffee table is a great choice. It might seem hard, but with some help, you can do it. Let's look at what you need and how to make your own DIY rustic furniture.
Material Selection
Picking the right materials is key for a real rustic farmhouse decor look. Here are some important ones:
- Reclaimed Wood: It looks old and is good for the planet. Look for wood from old barns or pallets.
- Natural Finishes: Choose stains and waxes that show the wood's grain well.
- Antique Hardware: Using old-style brackets, hinges, or drawer pulls can make it look even better.

Construction Steps
Are you ready to get started? Here's how to turn your materials into a lovely coffee table:
- Measure and Cut: First, measure your space to figure out your table's size. Then, cut your wood.
- Build the Frame: Put the table frame together with screws or nails. Make sure it's straight and strong.
- Attach the Tabletop: Fix the tabletop to the frame. You can get creative here with patterns like herringbone.
- Finish with Style: Sand everything smooth to avoid splinters. Then, apply your chosen finish, like stain or a clear coat.
And that's it! With the right materials and a clear guide, you can make DIY rustic furniture for your home. It doesn't matter if you're good at woodworking projects or just starting. This guide will help you.
Modern Hairpin Leg Coffee Table
Let's talk about using hairpin legs for DIY coffee tables. It's an easy DIY project that saves money. It also adds a chic look to your living space. Modern hairpin legs make any coffee table look sleek and stylish.
First, find the best materials. Hairpin legs are cheap on Amazon and Etsy. Then, pick a tabletop that matches your style. Think reclaimed wood or glass.
Putting it together is easy. Just a few screws and you have a stylish table. It's a great way to add creativity and flair to your home. Your guests will be impressed when they see it.
Here's a quick guide to get you started:
| Material | Estimated Cost | Where to Buy |
|---|---|---|
| Modern Hairpin Legs | $25-$40 | Amazon, Etsy |
| Reclaimed Wood Top | $30-$50 | Local Lumber Yard |
| Glass Top | $35-$60 | Home Depot, Lowe's |
Modern hairpin legs fit any style, from minimalist to rustic. They make creating a coffee table fun and rewarding. Ready to start your project? Happy crafting! 😊
Repurposed Bowling Alley Coffee Table
Having a piece of bowling history in your living room is cool. Let's make a unique coffee table from a bowling alley lane. This project is a fun DIY woodworking challenge.
Materials and Tools Needed
Before we start, here's what you'll need:
- Bowling Alley Lane Section
- Saw
- Sander
- Wood Stain
- Polyurethane Finish
- Steel Legs
- Drill
- Wood Screws
Detailed Building Instructions
First, prepare the lane section. Cut the wood to your coffee table size. Then, sand it to smooth out any rough spots.
Next, stain the wood to highlight its unique character. After the stain dries, apply a polyurethane finish. This will protect your coffee table and make it shiny. Use a drill to attach the steel legs with wood screws. Make sure everything is secure.
Finishing Touches
Your DIY woodworking project is almost complete! Add felt pads under the table legs to protect your floors. You can also add a stylish centerpiece or décor to make it stand out.
That's how you turn old bowling alley wood into a beautiful, unique coffee table. Now, every strike in your living room will feel like a win!
Glass-Top Coffee Table with Adjustable Frame
A glass-top coffee table can make a room look better. We picked the right materials and followed custom DIY plans to make one. It's both stylish and useful.
Building the Frame
The frame is key for our coffee table. We started with 3/4″ aluminum tubing for the legs. This made the table strong and modern.
We cut and brazed the aluminum. This method is precise and strong. Aluminum melts at 1200 degrees, but our brazing rod melts at 700 degrees. This makes the process work well.
Then, we sanded, primed, and painted the legs. We used plywood and walnut edge banding for the top. This gave it a nice look.
Attaching the Glass Top
After the frame was done, we added the glass top. We used the Rockler lift-top mechanism for a secure fit. We glued and screwed everything together carefully.
We finished it with boiled linseed oil and polyurethane. This gave it a strong and elegant finish. If you want a stylish and useful table, try this DIY plan.
Budget-Friendly Pallet Coffee Table
Ever see a pallet and think, “That could be a stunning coffee table!”? If you love DIY projects on a budget, this is for you. Making a pallet coffee table saves money and supports recycling. It's turning something ordinary into something amazing.
A pallet coffee table is simple yet charming. It's a way to make something useful while living sustainably. Plus, pallets are everywhere. Many stores give them away for free! With some creativity and basic tools, your living room can have a new centerpiece.
- Gather Your Materials: You'll need a pallet, sandpaper, wood stain or paint, and screws. You might also want wheels or a glass top.
- Prepare the Pallet: Sand the wood well to remove splinters. This is where you can get creative with stain or paint.
- Assemble the Table: Add legs or wheels if you want.
- Final Touches: Choose to add a glass top or keep it rustic.
By following these steps, you're not just making furniture. You're making a statement. So, if you're looking for a DIY project that's both useful and looks good, try a pallet coffee table. See how a simple pallet can become a beautiful piece of home decor.
16,000 Woodworking Plans
Imagine having over 16,000 woodworking plans at your fingertips. That's what Ted's Woodworking gives you. It's perfect for both newbies and experts, with plans for simple furniture to complex projects.
Ted's Woodworking stands out because it's so detailed. Each plan comes with blueprints, step-by-step guides, and lists of materials. This makes it easy to follow, whether you're making a simple coffee table or a fancy bookshelf.
Ted's Woodworking
Ted's Woodworking is a dream come true for DIY woodworking fans. It offers detailed plans for thousands of projects. Even beginners can feel confident and skilled with each project they finish.
Plus, Ted's Woodworking has both classic and modern designs. Want to wow your friends with a cool coffee table? You'll find many unique designs to choose from. Whether you like simple 2×4 projects or detailed ones, there's something for you.
Conclusion
We've finished our DIY coffee table journey. I hope you're as excited as I am to start these projects. Making your own coffee table adds a personal touch and a sense of pride to your home.
Each plan, from old wood to modern designs, lets you show off your style. It makes your home look better without much effort.
Looking back, DIY projects are more than just making furniture. They teach you new skills and make you happy. It's rewarding to turn simple materials into something beautiful.
Plus, these projects are great for talking to friends and family. They make your home more interesting.
The woodworking world is full of possibilities. Every project you finish makes you more confident. Keep trying new things and learning.
For more DIY tips and guides, check out this crafting the perfect blog structure guide. It can help you share your DIY adventures.